Beginner’s Guide: Installing Docker and Taking Your First Steps
Learn How to Install Docker and Start Using It Today
Why Should You Use Docker?
Docker brings many benefits to developers and teams:
-
Consistency → No more environment mismatch issues
-
Efficiency → Save system resources compared to VMs
-
Portability → Deploy the same app across multiple platforms
-
Scalability → Easily run multiple containers for microservices
-
Integration → Works seamlessly with modern CI/CD pipelines
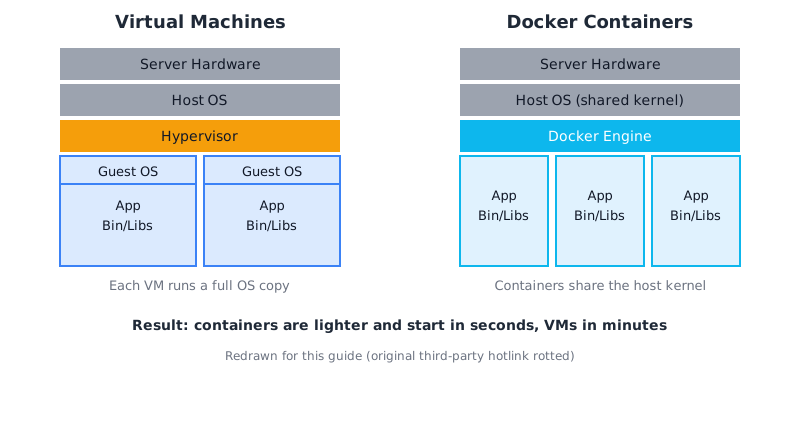
Here is a diagram showing the difference between Docker and virtual machines.
Installing Docker
Docker provides installation packages for Windows, Linux, and macOS. Let’s go through them:
1. Windows
-
Download Docker Desktop for Windows from Docker’s official site.
-
Install it like a regular application.
-
Ensure WSL 2 is enabled (Windows Subsystem for Linux 2).
-
After installation, open PowerShell or Command Prompt and test with:
docker --version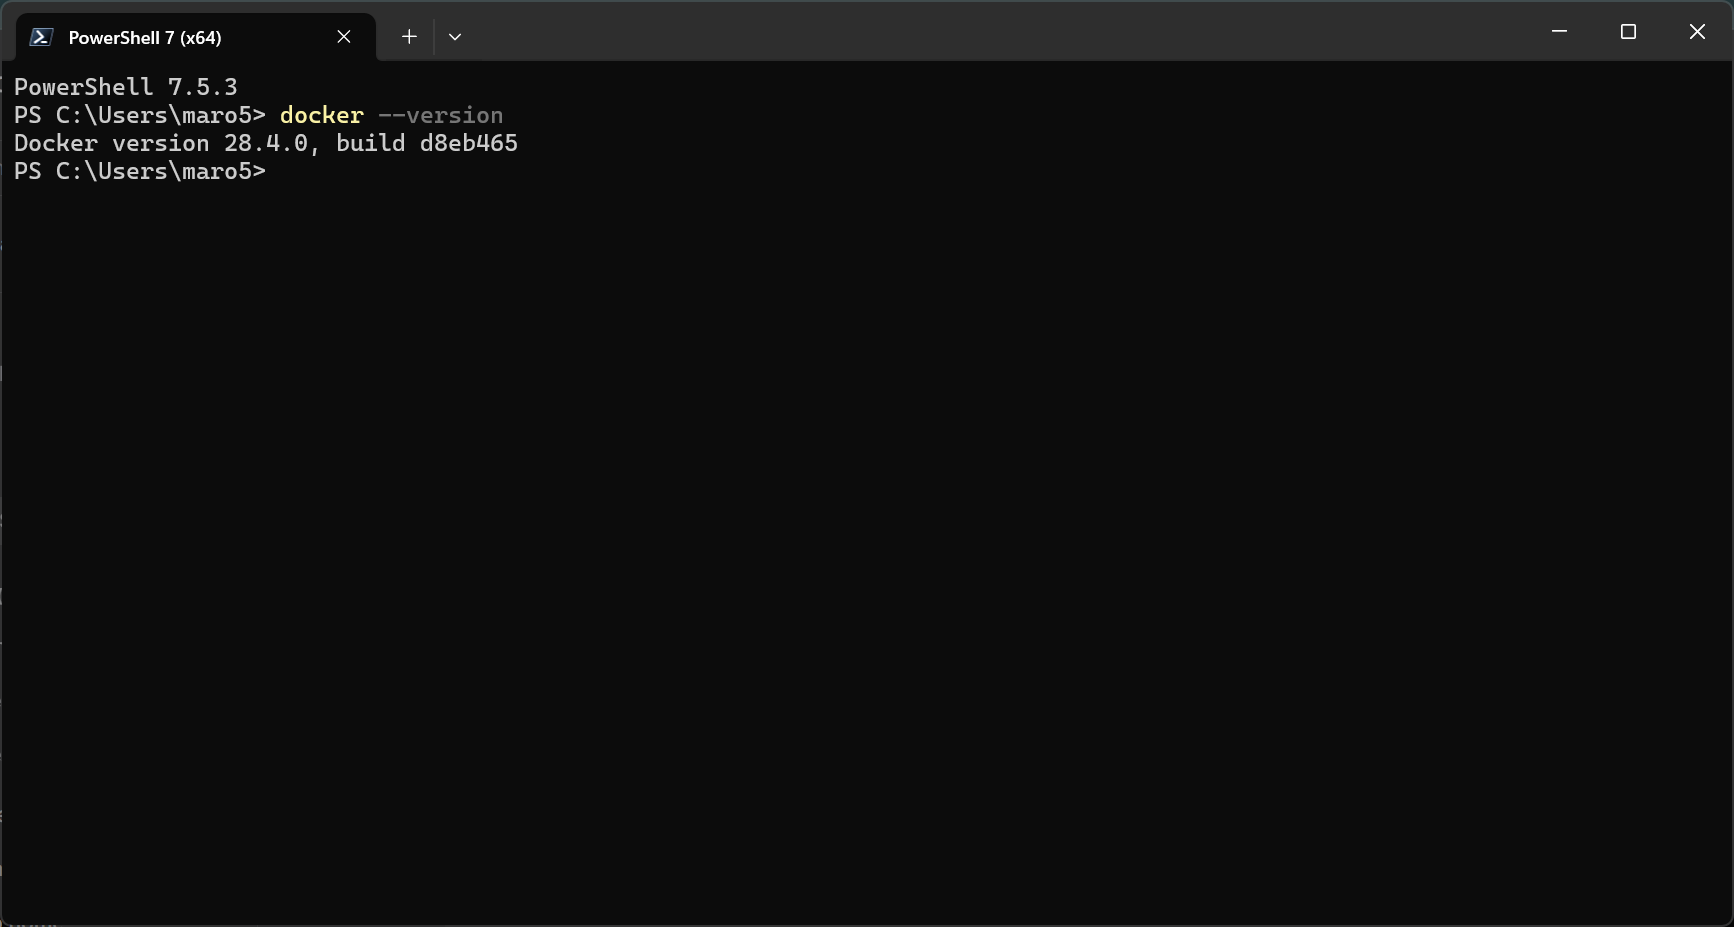
2. macOS
-
Download Docker Desktop for Mac from the same official page.
-
Install and launch the app.
-
Verify installation:
docker --version3. Linux
(a) Ubuntu/Debian
sudo apt-get update
sudo apt-get install ca-certificates curl gnupg lsb-release

# Add Docker’s official GPG key
sudo mkdir -p /etc/apt/keyrings
curl -fsSL https://download.docker.com/linux/ubuntu/gpg | sudo gpg --dearmor -o /etc/apt/keyrings/docker.gpg

# Setup repo and install
echo \
  "deb [arch=$(dpkg --print-architecture) signed-by=/etc/apt/keyrings/docker.gpg] \
  https://download.docker.com/linux/ubuntu \
  $(lsb_release -cs) stable" | sudo tee /etc/apt/sources.list.d/docker.list > /dev/null

sudo apt-get update
sudo apt-get install docker-ce docker-ce-cli containerd.io docker-buildx-plugin docker-compose-plugin
Check version:
docker --version(b) RHEL / CentOS
# Remove old versions
sudo yum remove docker \
                docker-client \
                docker-client-latest \
                docker-common \
                docker-latest \
                docker-latest-logrotate \
                docker-logrotate \
                docker-engine

# Setup repository
sudo yum install -y yum-utils
sudo yum-config-manager --add-repo https://download.docker.com/linux/centos/docker-ce.repo

# Install Docker
sudo yum install -y docker-ce docker-ce-cli containerd.io docker-buildx-plugin docker-compose-plugin

# Start and enable service
sudo systemctl start docker
sudo systemctl enable docker
Check version:
docker --versionPost-Installation Setup (Linux Only)
By default, you’ll need sudo to run Docker commands. To avoid typing sudo
every time, add your user to the docker group:
sudo usermod -aG docker $USERThen log out and log back in (or restart your system). Verify by running:
docker run hello-worldIf it works without sudo, the setup is complete.
Running Your First Container
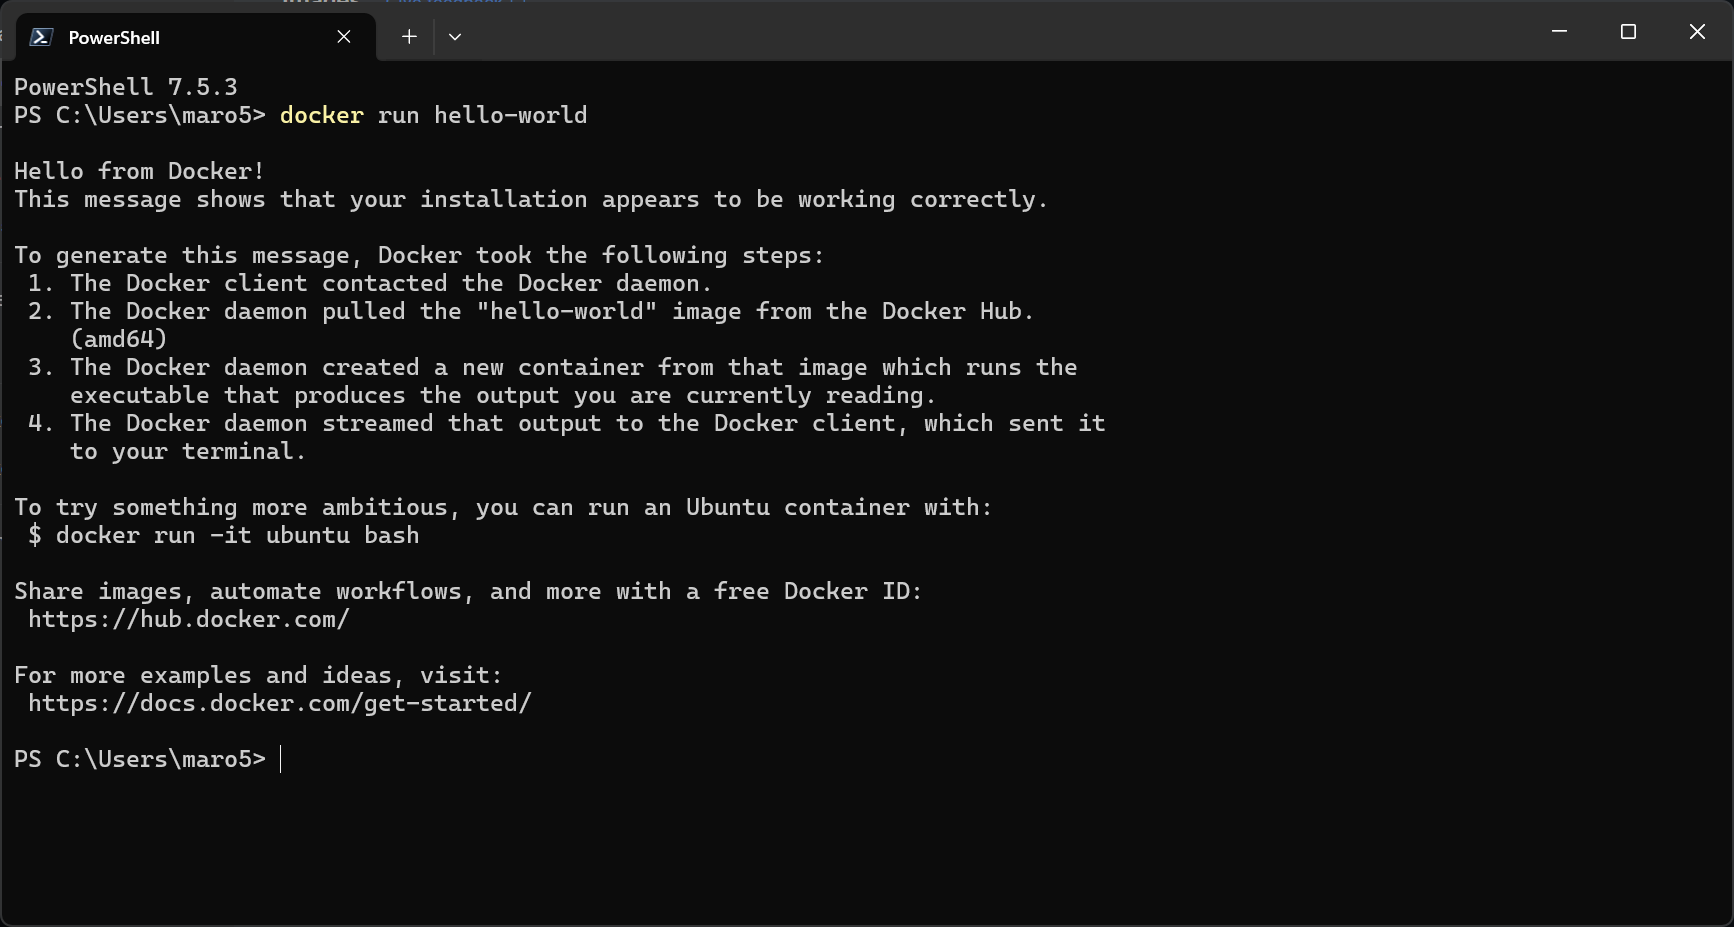
Now that Docker is installed, let’s test it by running a simple container:
docker run hello-worldWhat happens here?
-
Docker checks if the
hello-worldimage exists locally. -
If not, it pulls it from Docker Hub (a public registry of images).
-
A new container runs and prints a welcome message.
Congratulations 🎉 — you’ve successfully set up Docker and launched your first container!
Key Terms to Remember
-
Image → The blueprint for your container.
-
Container → A running instance of an image.
-
Docker Hub → A registry of pre-built images.
-
Dockerfile → Instructions for building custom images.
What’s Next?
In the next article, we’ll dive deeper into Docker basics: exploring images, containers, and registries in detail.
Stay tuned for Part 2: Understanding Images, Containers, and Registries in Docker.