Deploy a Flask + MariaDB Note App on EC2 (Amazon Linux 2023) — Complete Guide
Deploy a Flask + MariaDB note app on a free-tier EC2 instance running Amazon Linux 2023 — from launching the server to connecting the database.
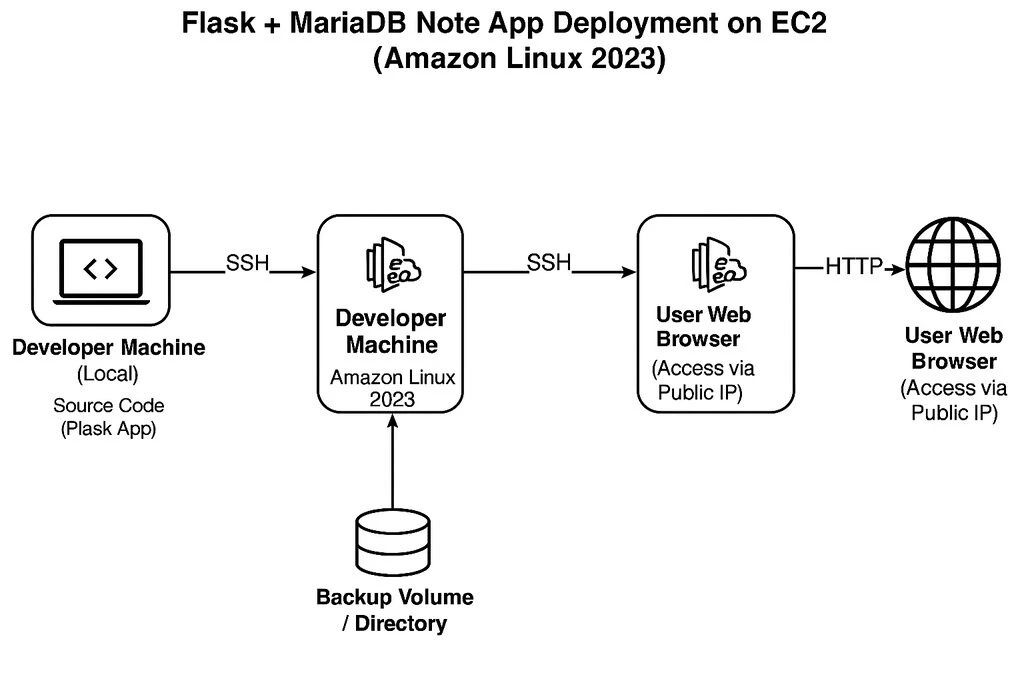
This guide walks you through deploying a simple Flask web app connected to a MariaDB database on a free-tier Amazon EC2 instance running Amazon Linux 2023.
Prerequisites
-
An AWS account
-
EC2 instance (Amazon Linux 2023)
-
Security group with port 5000 open (or port 80 if using a web server)
-
SSH access to the instance
-
Basic knowledge of Python & Linux terminal
Step 1 : Connect to your EC2 instance
We will login using Keypair method and Powershell or Terminal on Linux by Using SSH command.
ssh -i your-key.pem ec2-user@<your-ec2-public-ip>Step 2 : Install the required packages and setting up the environment.
Here is a list of all python packages needed for the deployment. Keep in mind the current working Python version is (3.9.23)
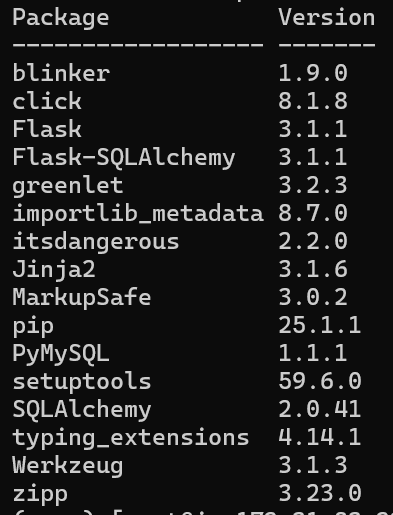
This command is for installing the required packages
sudo dnf install -y python3 python3-pip mariadb105-server mariadb105 gitNote: You need to enable mariadb and start it to make it work correctly with the web app.
sudo systemctl enable mariadb
sudo systemctl start mariadb
Step 3 : Creating the folder structure and writing the required codes for the app.
noteapp/
├── app.py               # Main Flask application
├── config.py            # App configuration (DB URI, secret key)
├── models.py            # SQLAlchemy models (Note table)
├── requirements.txt     # Python dependencies
├── templates/
│   └── index.html       # HTML template for the app UI
└── venv/                # Python virtual environment (auto-created)
Python Files
-
app.pyfrom flask import Flask, request, redirect, render_template from config import SQLALCHEMY_DATABASE_URI, SECRET_KEY from models import db, Note app = Flask(__name__) app.config['SQLALCHEMY_DATABASE_URI'] = SQLALCHEMY_DATABASE_URI app.config['SECRET_KEY'] = SECRET_KEY db.init_app(app) with app.app_context(): db.create_all() @app.route('/', methods=['GET', 'POST']) def index(): if request.method == 'POST': content = request.form['content'] if content: new_note = Note(content=content) db.session.add(new_note) db.session.commit() return redirect('/') notes = Note.query.all() return render_template('index.html', notes=notes) if __name__ == '__main__': app.run(host='0.0.0.0', port=5000) -
config.py- Remember to update your database username and password
import os DB_USER = 'root' DB_PASSWORD = 'maro1234' DB_HOST = 'localhost' DB_NAME = 'notesdb' SQLALCHEMY_DATABASE_URI = f'mysql+pymysql://:@/' SQLALCHEMY_TRACK_MODIFICATIONS = False SECRET_KEY = os.urandom(24) -
models.pyfrom flask_sqlalchemy import SQLAlchemy db = SQLAlchemy() class Note(db.Model): id = db.Column(db.Integer, primary_key=True) content = db.Column(db.Text, nullable=False) -
requirements.txtFlask==3.1.1 Flask-SQLAlchemy==3.1.1 PyMySQL==1.1.0 -
templates/index.html<!DOCTYPE html> <html> <head> <title>Notes</title> </head> <body> <h1>My Notes</h1> <form method="POST"> <textarea name="content" required></textarea><br> <button type="submit">Add Note</button> </form> <ul> <li>}</li> </ul> </body> </html>
Step 4 : Creating the virtual environment and running the application
We need to setup the virtual environment for the app for many useful reason:
-
Keeps your app’s dependencies isolated from the system.
-
Prevents version conflicts.
-
Enables reproducibility on other systems or servers.
python3 -m venv venv
source venv/bin/activate
pip install --upgrade pip
pip install Flask Flask-SQLAlchemy PyMySQL
Step 5 : Running the application
We will write this command in the virtual environment terminal
python app.pyTo access the application , open in the browser :
http://<your-ec2-public-ip>:5000- You need to replace the placeholder with your EC2 Public IP address
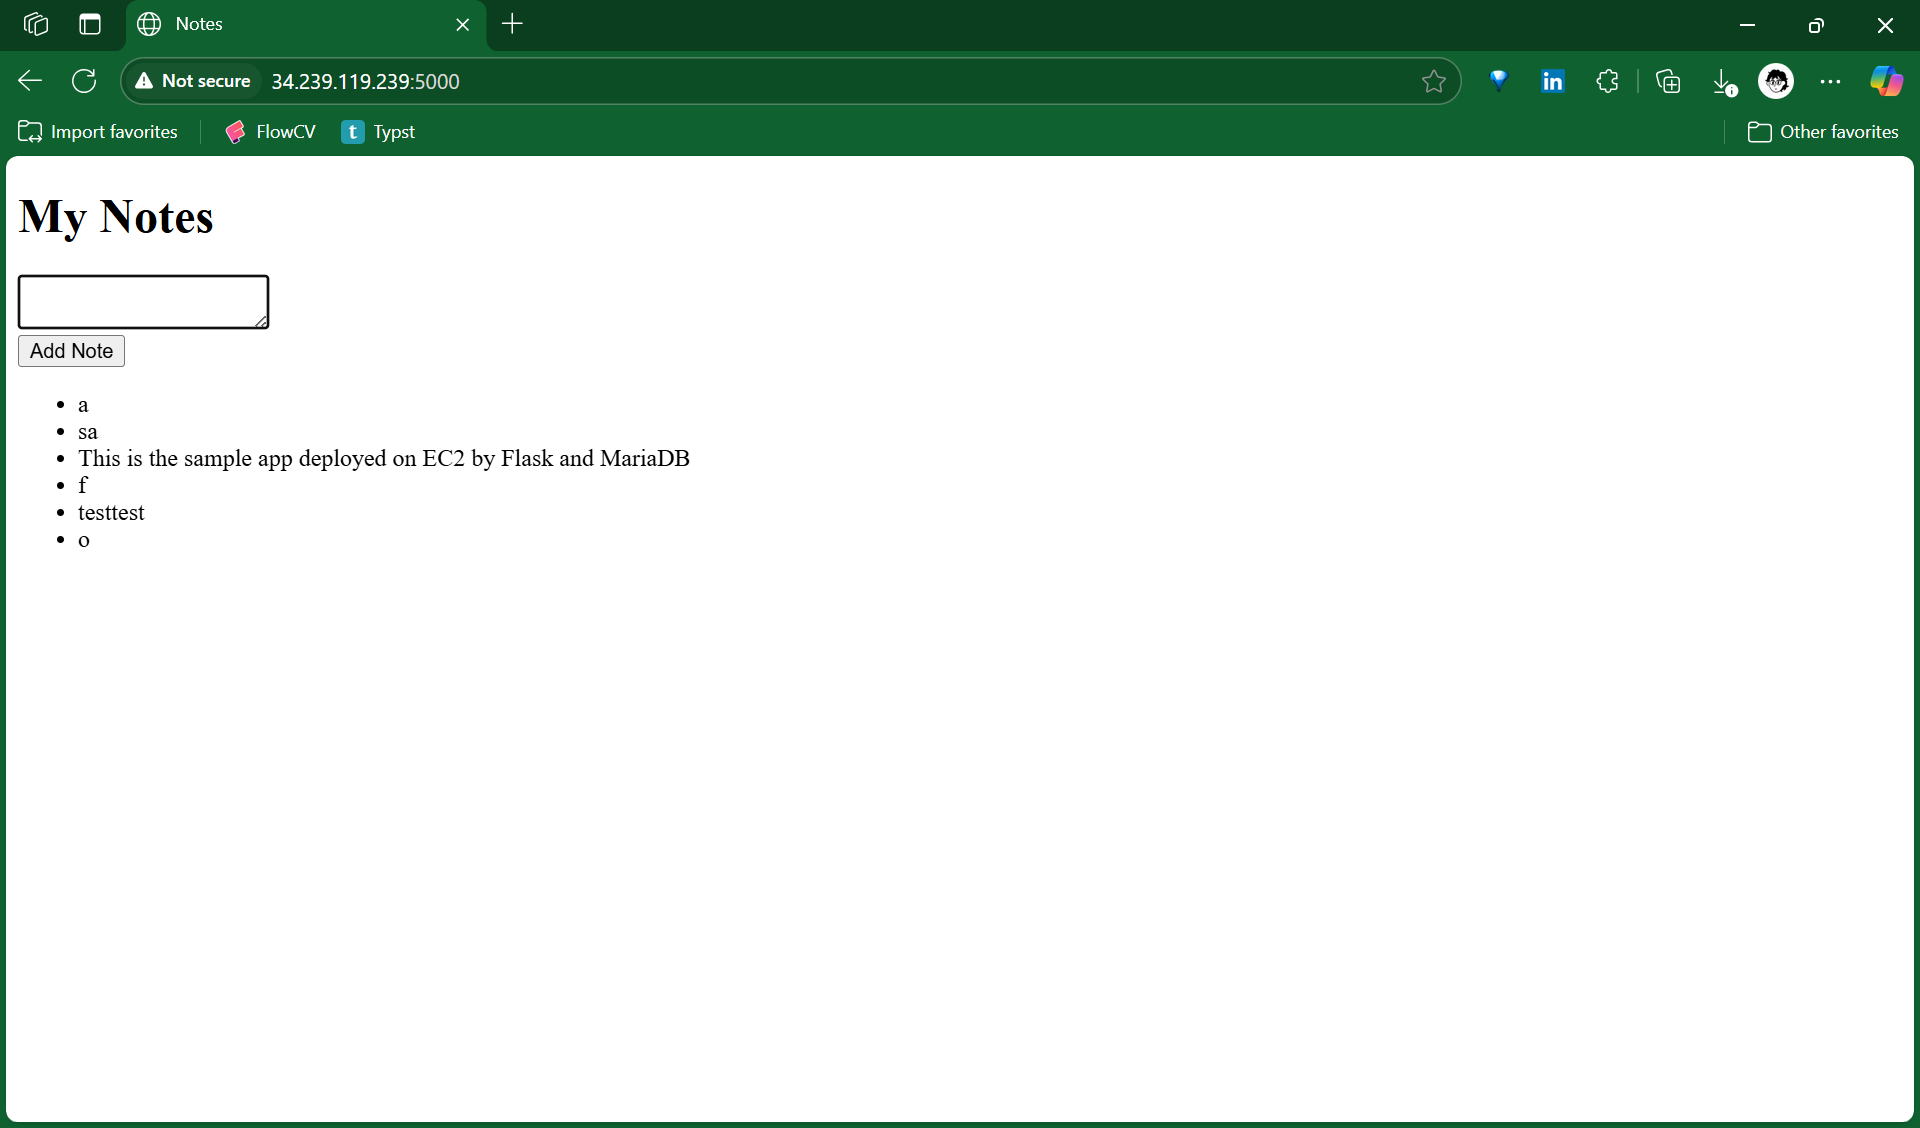
Here is a screenshot of the app while its running.
Summary for the project requirements
-
Amazon Linux + MariaDB + Flask app
-
Systemd starts the DB
-
Flask reads from MariaDB using SQLAlchemy and PyMySQL
-
Public IP + port 5000 = access from anywhere
Backing up the Database on a Mounted EBS Volume
Attach & Mount EBS Volume
Important Note : You need to know the correct name of the attached volume by
using lsblk command and replace it in the /dev/…
sudo mkfs -t xfs /dev/nvme1n1   # format the disk (only once!)
sudo mkdir /mariadb
sudo mount /dev/nvme1n1 /mariadb
Persist Across Reboots
echo "/dev/nvme1n1 /mariadb xfs defaults,nofail 0 0" | sudo tee -a /etc/fstabStop MariaDB
sudo systemctl stop mariadbSetting Permissions
sudo chown -R mysql:mysql /mariadb/mysqlRestarting MariaDB
sudo systemctl start mariadbBacking up the DB
sudo mysqldump -u root -p notesdb > /mariadb/notesdb_backup.sqlTo confirm the backup is successful you need to run this command
ls -lh /mariadbThe output should be like this
-rw-r--r-- 1 root root 12K Jul 16 10:25 notesdb_backup.sql